Posted on

Dr. Shrikant Jichkar – the most qualified person in India

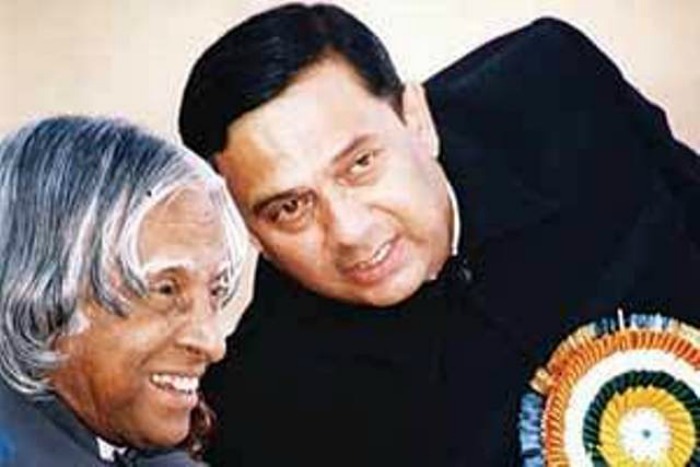
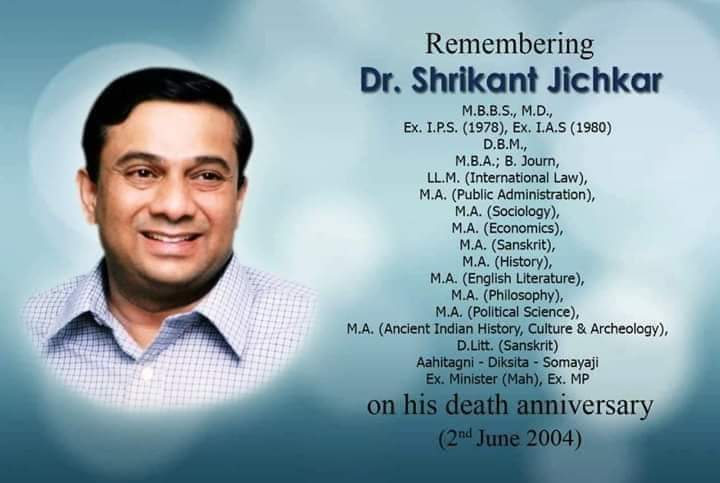
Dr. Shrikant Jichkar (श्रीकांत जिचकार) born : 14 September 1955 & die : 2 June 2004, who obtained 20 degrees after appearing for 42 university examinations. Also a politician, known to be the elected as the youngest MLA in the country, at age 26.

  • Man with highest number of degree
  • Limca Book of World Record holder
  • Multiple Scholar
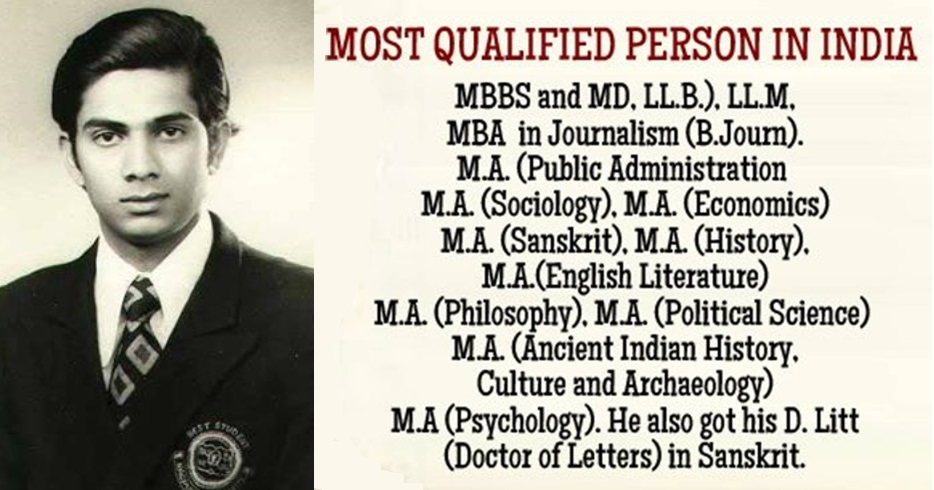
  • Most qualified Indian ever
  • Honor of India
  • Master of Masters
  • Receiver of highest of any degree ever
  • Youngest Indian politician ever
  • Non-academic pursuits

Biography

Between the years 1973 – 1990, simultaneously he applied in 42 University Examinations each summer and winter, and got over 20 graduate & post-graduate degrees.

He started carrier as doctor – MBBS and then MD from Nagpur, he did his Law – LL.B. degree with post-graduation in International Law, DBM and MBA (Masters in Business Administration) and Journalism (B.Journ). He got his D. Litt (Doctor of Literature) in Sanskrit, the highest of any degree in a university. Most of his degrees are with First Merit and he has obtained several Gold Medals for his degrees. Between 1973 and 1990 he wrote 42 university examinations, every summer and every winter.

He passed for LLB degree and after went for LLM (International Law). It didn’t just stop here, again signed up for Masters in Business Administration (DBM and MBA) and Journalism (B.Journ back then.)

He was MA in Masters in Economics, MA in English, MA in Literature, MA in Sanskrit, MA in Indian History, MA in Public administration, MA in Political Science, MA in Sociology.

At age of 25, in 1978, he examin for the IPS (Indian Police Service), and then started preparing for the IAS (Indian Administrative Services) examination.

He own Masters in Philosophy, Culture & Archaeology, and Psychology, also has a D. Litt (Doctor of Letters) in Sanskrit to his name, the highest of any Degree in a University.

Most of his degrees are with First Merit, he obtained several Gold Medals too.

After a successful attempt in 1980, he got elected as MLA in the Maharashtra, becoming the youngest ever politician to hold 14 portfolios at a time. He was a member of Rajya Sabha in year s 1992-98.

He was passionate in painter, a professional photographer, a theater artist, and brilliant orator, who loved to speak on issues like health, economics, and other religious discourses.

he owned one of the biggest personal libraries in India with over 52,000 books.

Accident and death

On June 2, 2004, while on his way from Nagpur, his car was rammed by a truck from the opposite direction, and he succumbed to his injuries later in the day; he was just 51.

Posted on

Covid-19 virus (Coronavirus) is good or bad

Well covid-19 is one of very important factor this time (year 2020) because whole the world are talking about this and care about this. People want to get away from it. Is it such a danger or serious virus? GOOD OR BAD ?

What we learn from this?

Value of Nature

Value of Family and Friends

Value of home

Value of home science (cooking, home management & maintenance)

True happiness of live together in one roof 24×7

True friends and well wishers

Importance of our work place

Enjoy of fresh environment like fresh air, fresh vision, fresh nature…

No tension of work

No traffic problem for office and work, child school

Value of SAVING – save money for emergency – save money for future

New creative idea and innovation from home (stay home & stay safe)

Social distance

Play indoor games

Enjoy with child

Work from home

Posted on

Install a Plugin using the WordPress Admin Plugin Upload

Paid WordPress plugins are not listed in the WordPress plugin directory. That’s why WordPress has the Upload method to install such plugins. We will show you how to install WordPress plugin using the upload option in the admin area.

First, you need to download the plugin from the source (which will be a zip file). Next, you need to go to WordPress admin area and visit
Plugins » Add New page.

After that, click on the Upload Plugin button on top of the page.

uploadpluginwpadmin


This will bring you to the plugin upload page. Here you need to click on the choose file button and select the plugin file you downloaded earlier to your computer.

pluginuploadpage


After you have selected the file, you need to click on the install now button.

WordPress will now upload the plugin file from your computer and install it for you. You will see a success message like this after installation is finished.

plugininstalledmanual


Once installed, you need to click on the Activate Plugin link to start using the plugin.

You would have to configure the settings to fit your needs. These settings will vary for each plugin therefore we will not be covering that in this post.

Manually Install a WordPress Plugin using FTP

In some cases, your
WordPress hosting
provider may have file restrictions that could limit your ability to install a plugin from the admin area.

In this situation, your best bet is to install the plugin manually using FTP.

The FTP manager method is the least friendly for beginners.

First you will need to download the plugin’s source file (it will be a zip file). Next, you need to extract the zip file on your computer.

Extracting the plugin zip file will create a new folder with the same name. This is the folder that you need to manually upload to your website using a
FTP client
.

You would need to access your host through the FTP manager. If you do not have your FTP username and password, then contact your
WordPress hosting
provider and ask them.

Open the FTP client on your computer and connect to your website using the login credentials provided by your web host. Once connected, you need to access the path
/wp-content/plugins/

Next, upload the folder you extracted from the zip file to the
/wp-content/plugins/
folder on your web server.

ftppluginupload


After uploading the files, you need to visit the WordPress admin area and click on the
Plugins
link in the admin menu. You will see your plugin successfully installed on the plugins page.

You need to click on the Activate link below the plugin. Upon activating, you may need to configure the plugin settings. WordPress plugins come with their own settings which differ from one plugin to another so we will not describe them here.

We hope this helped you learn how to install WordPress plugins. You may also want to see our plugins category where we write about the
best WordPress plugins
that you can use to accomplish whatever you’re looking to do. Each of those articles come with step-by-step instructions on how to setup individual plugins.

Posted on

How to create Google Map API For your website?

Setting up Your Google Maps API Key

Setp Wise here

STEP : 01

Click the link https://console.developers.google.com/apis/library

STEP : 02

api_01

STEP : 03

api_02

STEP : 04

api_03

STEP : 05

api_04

STEP : 06

Add details as added in the screen image and user this API only.

api_05

Thank Your
Posted on

Codestyling Localization : WordPress Plugin

Please download the plugin from the URL :: Codestyling Localization


codestyling-localization

While get in touch with WordPress you will find out, that the initial delivery package comes only with english localization. If you want WordPress to show your native language, you have to provide the appropriated language file at languages folder. This files will be used to replace the english text phrases during the process of page generation.


The basis for translations are language files defined as *.po format (portable) or *.mo format (machine object), which helps software to get translated on the fly.


The Plugin Mainpage – The Beginning

If you have installed plugin very first time you can see the “Add New Language” button to add new language as it may be not the language or the language you want to display.

001


After Pressed on “Add New Language” button you can see below pop up and from where you should select your local language and  Press button “create po-file“.

02


It will give you generated “PO” file in your plugin/theme/wordpress folder. If the PO file is not in the  plugin/theme/wordpress  “languages” folder, then you should manually add the “PO” to plugin/theme/wordpress  “languages” folder.


002


Now You should Press “Rescan” button and see below image. and then press “Scan Now” button to scan all localization (translatable) words.

Once the Scan process complete you should manually press “finished” button.

004


Press “Edit” button to start the words to translate as per your language.

See how the Default PO file will display.

005


If you want to edit/add your word to local language you should press edit once and continue as per next settings…….

006


Once all words translated you should convert the file to “.MO” file as per below image.


007


THAT’S ALL


Get more details from : http://www.code-styling.de/english/development/wordpress-plugin-codestyling-localization-en

Posted on

Changing the Google Maps Language

In order to change the in-map language as well as the directions output language, slight modification to two lines of code needs to take place.

Example of Google Maps in French:


Open the google map code  and search for the following line:

maps.google.com/maps/api/js?sensor=false

There are multiple instances of this line, all need to be changed to the following:

maps.google.com/maps/api/js?sensor=false&language=fr-fr

This will change the map to French.

Language Identifier
Afrikaans af
Albanian sq
Basque eu
Belarusian be
Bulgarian bg
Catalan ca
Chinese (Simplified) zh-cn
Chinese (Traditional) zh-tw
Croatian hr
Czech cs
Danish da
Dutch nl
Dutch (Belgium) nl-be
Dutch (Netherlands) nl-nl
English en
English (Australia) en-au
English (Belize) en-bz
English (Canada) en-ca
English (Ireland) en-ie
English (Jamaica) en-jm
English (New Zealand) en-nz
English (Phillipines) en-ph
English (South Africa) en-za
English (Trinidad) en-tt
English (United Kingdom) en-gb
English (United States) en-us
English (Zimbabwe) en-zw
Estonian et
Faeroese fo
Finnish fi
French fr
French (Belgium) fr-be
French (Canada) fr-ca
French (France) fr-fr
French (Luxembourg) fr-lu
French (Monaco) fr-mc
French (Switzerland) fr-ch
Galician gl
Gaelic gd
German de
German (Austria) de-at
German (Germany) de-de
German (Liechtenstein) de-li
German (Luxembourg) de-lu
German (Switzerland) de-ch
Greek el
Hawaiian haw
Hungarian hu
Icelandic is
Indonesian in
Irish ga
Italian it
Italian (Italy) it-it
Italian (Switzerland) it-ch
Japanese ja
Korean ko
Macedonian mk
Norwegian no
Polish pl
Portuguese pt
Portuguese (Brazil) pt-br
Portuguese (Portugal) pt-pt
Romanian ro
Romanian (Moldova) ro-mo
Romanian (Romania) ro-ro
Russian ru
Russian (Moldova) ru-mo
Russian (Russia) ru-ru
Serbian sr
Slovak sk
Slovenian sl
Spanish es
Spanish (Argentina) es-ar
Spanish (Bolivia) es-bo
Spanish (Chile) es-cl
Spanish (Colombia) es-co
Spanish (Costa Rica) es-cr
Spanish (Dominican Republic) es-do
Spanish (Ecuador) es-ec
Spanish (El Salvador) es-sv
Spanish (Guatemala) es-gt
Spanish (Honduras) es-hn
Spanish (Mexico) es-mx
Spanish (Nicaragua) es-ni
Spanish (Panama) es-pa
Spanish (Paraguay) es-py
Spanish (Peru) es-pe
Spanish (Puerto Rico) es-pr
Spanish (Spain) es-es
Spanish (Uruguay) es-uy
Spanish (Venezuela) es-ve
Swedish sv
Swedish (Finland) sv-fi
Swedish (Sweden) sv-se
Turkish tr
Ukranian uk
Posted on

WooCommerce 2.1.1 Version

woocommerce_bundles


You can see that WooThemes has released new version of WooCommerce (the most famous and great wordpress ecommerce free plugin). The wooCommerce versios 2.1.1 is released on 2014-02-10.  Meanwhile our team was working on a wooCommerce theme development since more than one month. As soon as we upgrade the wooCommerce  plugin we found that wooCommerce has changed many functions and added new features. As per the previous version of wooCommerce, every thing was working ok but as soon as we upgrade the plugin the theme stop working.

We also found that if you have changed product listing page, products detail pages and wooCommerce  setting pages like forgot password, my account, edit profile …. all are changed. So in case you are using the wooCommerce theme working in previous version of wooCommerce, make sure to have backup must that if the theme is highly customize, major function will stop working and may cause your site stop working.

It is very good thing to continue your site working with previous version of WooCommers instead of latest updated plugin.

Thanks to reading. Have a nice day.

Posted on

Banners Galore Vantage


Vantage is the original & most popular Vantage theme for WordPress by Appthemes.

Banner Advertisement to maximize your Ad revenue. The plugin allow you to add the Advertisement Banner and Advertisement Script like Google Ads.

You can set the Different Advertisement for defend pages like Home page, Different Category Listing Page, Ads Detail pages, Content Pages for Different Places like Above Header, Below Header, Above Footer, Below Footer, Above listing start, Below listing end. Also for Ads detail page above and below ads description. Same way the plugin has the feature such a way that you can set your advertisement after every ads listing of 2,3,4,5 or 6 for listing Page. Please see screen images & demo for more details.

Significant Features:

  • Banner Advertisement to maximize your Ad revenue.
  • Different Banner spaces for Different places & pages
  • Banner spaces for different places like Above & Below Header, Above & Below Footer, Above listing start & Below listing end
  • Banner space option for Ads detail page above and below ads description
  • Banner spaces options for Individual Category Listing, To get more advertisement space can set deferent banners for all listing category pages
  • Different Banner options for Home page, Ads Details pages, Content Pages & Blog Pages
  • Sequential Banner ads after every number of ads like after every 2 ads or after every 3 ads and so on..
  • Compatible with Vantage 1.1.4+

View more detail >>

Posted on

Banners Galore ClassiPress

ClassiPress is the original & most popular classified ads theme for WordPress by Appthemes.

Banner Advertisement to maximize your Ad revenue. The plugin allow you to add the Advertisement Banner and Advertisement Script like Google Ads.

You can set the Different Advertisement for defend pages like Home page, Different Category Listing Page, Ads Detail pages, Content Pages for Different Places like Above Header, Below Header, Above Footer, Below Footer, Above listing start, Below listing end. Also for Ads detail page above and below ads description. Same way the plugin has the feature such a way that you can set your advertisement after every ads listing of 2,3,4,5 or 6 for listing Page. Please see screen images & demo for more details.

Significant Features:

  • Banner Advertisement to maximize your Ad revenue.
  • Different Banner spaces for Different places & pages
  • Banner spaces for different places like Above & Below Header, Above & Below Footer, Above listing start & Below listing end
  • Banner space option for Ads detail page above and below ads description
  • Banner spaces options for Individual Category Listing, To get more advertisement space can set deferent banners for all listing category pages
  • Different Banner options for Home page, Ads Details pages, Content Pages & Blog Pages
  • Sequential Banner ads after every number of ads like after every 2 ads or after every 3 ads and so on..
  • Compatible with ClassiPress 3.2.0+

Home Page Settings

banner_ads_classipress-screenshot-1

Ads Detail Page

banner_ads_classipress-screenshot-2

Advertisement Admin Listing

banner_ads_classipress-screenshot-3

Advertisement Admin Settings

banner_ads_classipress-screenshot-4

View more detail >>

Posted on

Remix ClassiPress Child Theme

A responsive, multi-color scheme ClassiPress child theme, compatible with WooCommerce Plugin. You can get all benefits of WooCommerce Plugin to create your online store. The Remix child theme adapts your website to mobile devices, desktop, and any other viewing environment. Upgrade your current website so it’s mobile-friendly and automatically adapts to small screen resolution or device.

Responsive Child Theme

Unique Features

  • Mobile friendly that automatically adapts to most of screen resolution.
  • Multiple color schemes
  • WooCommerce Plugin Compatible
  • Banner Advertisement with sliding effects.
  • Social share buttons on single pages. like, facebook share, twitter share, google plug share etc…
  • Multiple social network buttons integrated at top strip.
  • Additional advertisement space for google ads in Header & Footer.
  • WordPress Multisite compatible
  • Compatible with ClassiPress 3.2.0+

02_theme_settings1

03_theme_settings2

01_home

View more detail >>

Posted on

Dresser Online Shopping Cart & Photography Theme

Home Page Blue Color Skins

Online Shopping Cart & Photography Theme

Dresser is a responsive Multipurpose online shopping e-commerce cart with wooCommerce plugin support by woothemes & Business WordPress CMS theme. Provides all the main functionality you will need to present your products, work and yourself online in an elegant and professional style.

Every Online store wants to present the products, work and himself online in an elegant and professional style. So, we came up with such a flexible design which will give you top notch & easy to use features that will make you stand out from the normal Multipurpose Business theme. This unique theme has very user friendly interface which can turn your visitor in to your buyer.

Our theme has core features like fully responsive, multiple color scheme options, localization ready, easy and attractive theme option settings, large collection of short codes, Page templates with pre-made styles and functions and much more.

The theme is SEO Friendly and added all options like All-in-One SEO plugin. Home page is fully widget ready, you can change top navigation, main navigation (via custom menu), Slider settings, home content section & footer section. You will get 6 different color skins with the theme, theme code is localization ready, HTML code is W3C validate, well structured, easily add you code via action hook without change the file code & also get good and useful shotcodes which is usable vai post/pages and widgets also.

Shop Page included full width shopping cart where all products listing display. Also you can see the full width portfolio page with 4 different variation. In built contact form, site map & archive page template and other templates also…

Home Page Structure

Theme Color Skins

View more detail >>

Posted on

Website Speed & Webpage load Optimization

website-speed

In the world of high speed net with reach and beautiful web world, people try to make the website effective by add & add new thing. Now it’s time of jQuery & HTML 5 and people are crazy to add effective slider, image effects, they want wonderful and attractive flash effect in html format via jquery. To fulfill the requirement developers add new & new jquery plugins code every time with related css & images. It create new problem of slow website page load while your inter connection is not much good. If you have high speed internet then it’s working wonderful at your screen but what about those users who has high speed internet connection is very costly to afford. For such users while they try to access such heavily loaded websites they stuck with problem of time out or they must have to wait for some time to see the website and YAA!!! now a days google search engine also count website speed for SEO and searching.

website-speed
So now the time to let user to enjoy the website of heavy loaded jQuery and flash effect either internet is high speed or normal. If your internet is high speed then you have the most amazing experience while it should also good experience for average speed internet users. In this topic I am going to show you some steps how to optimize and make your webpage load faster and fastest.

You may like to see my website speed .

To decrease your web page load speed to minimum load you need to follow below steps one by one.

  • Load your website with website URL: http://www.webpagetest.org/
  • Get the report of your website loading items for home page or any other page you want to rest, it will give the complete report of web page load elements with time.
  • Get collect the element either css/JavaScript/image which takes more time to load.
  • Most important and first step is try to find the 404 error links, it mean the image/css/JavaScript file loading in your webpage but actually it’s not available so in this case your browser will try to search it till time out of some seconds and then only it will go for next element to load. In such case it’s just time waste for load the webpage via browser it such elements take most time and may be reason to low speed load webpage problem. So first of all find such elements from the coding and remove it as it’s no meaning in the page and just disturbing the browser to load the page.
  • Second is try to avoid outer page links load for image/css/JavaScript, because if in some case the website from where you are trying to load the image/css/JavaScript is slow, it will affect your webpage load.
  • Third is user minimum JavaScript file include, I don’t saying you to don’t user the JavaScript but only try to merge all those JavaScript code in one file so if you are including total of 10 js files you should merge those in to one or two and check the website speed. I am sure it will affect the site speed as normally all browser cache the js, css & image after second time you load the webpage and as number of link request is lowest, your site speed will highest.
  • Forth step is use encrypted/packed version of JavaScript file as files are light weight and it may help to load webpage easy.
  • Fifth step is optimize your css files and same as above in JavaScript case merge all css files to one or two css files so it will decrease number of link request. Also you need to optimize the css via css optimizer freely available on the internet.
  • Six step is check image load, if any image takes much load time, get it download and make the size minimum so that it may less time to load. and try to merge all icons & small images in to one single image so it also minimum the link request.
  • Seventh step is check your html structure (it’s optional) as you need designer help to check the html structure and optimize the html structure.
  • Eighth step & most last step is user cache plugin. In the wordpress there are many cache plugins freely available and not for wordprss you can find such available and readymade code may available in the net and can use it.
  • Last step is related to technical person which is somewhat related to cache the site page, I have added below code which you need to add at starting of .htaccess file. If you are a technical person or you have a little knowledge of .htaccess file of your website you can do it or it may stop your site working. So please make sure you are confident.

    Note : before you start optimization if you have technical knowledge of .htaccess, you should try below code at very beginning and see the effect. It should surely become effective for your site.

    ————————————————————————-
    Below code will cache all media files with extension : flv|gif|jpg|jpeg|png|ico|swf
    all content files with extension : js|css|pdf|txt
    webpage files : html|htm
    It will never cache files with extension : pl|php|cgi|spl|scgi|fcgi
    ————————————————————————-

    # cache images and flash content for one month
    <FilesMatch ".(flv|gif|jpg|jpeg|png|ico|swf)$">
    Header set Cache-Control "max-age=2592000"
    </FilesMatch>
    # cache text, css, and JavaScript files for one week
    <FilesMatch ".(js|css|pdf|txt)$">
    Header set Cache-Control "max-age=604800"
    </FilesMatch>
    # cache html and htm files for one day
    <FilesMatch ".(html|htm)$">
    Header set Cache-Control "max-age=43200"
    </FilesMatch>
    # explicitly disable caching for scripts and other dynamic files
    <FilesMatch "\.(pl|php|cgi|spl|scgi|fcgi)$">
    Header unset Cache-Control
    </FilesMatch>
    FileETag none

    ————————————————————————-

The above steps are common for the entire website in any language and any technology. Because webpage speed is most important factor for end user and no one will see your site if it’s not easily loaded on user screen. Please follow steps and on every step change check your website speed on http://www.webpagetest.org or any other speed checker system to see the effect.

Best Of luck & feel free for any kind of help or support. We provide you either free help and/or paid support also if needed. But you can see the effective output and I guarantee that you may like our service.

Posted on

WooStore Online Shopping cart with wooCommerce Plugin & Business Theme

Online Shopping Cart & Business Theme

A responsive Multipurpose online shopping e-commerce cart with wooCommerce plugin support by woothemes & Business WordPress CMS theme. Provides all the main functionality you will need to present your products, work and yourself online in an elegant and professional style.

Every Online store wants to present the products, work and himself online in an elegant and professional style. So, we came up with such a flexible design which will give you top notch & easy to use features that will make you stand out from the normal Multipurpose Business theme. This unique theme has very user friendly interface which can turn your visitor in to your buyer.

Our theme has core features like fully responsive, multiple color scheme options, localization ready, easy and attractive theme option settings, large collection of short codes, Page templates with pre-made styles and functions and much more.

See Our Fully Responsive Demo

Key Features of Theme :

  • A responsive Online shopping cart(e-commerce) & Multipurpose Business WordPress CMS theme
  • Fully Responsive, mean the design will adapt to mobile phones and tablets for a more intuitive browsing experience
  • Clean Design elements
  • Stylish feature rich design with super simple admin panel
  • multiple custom page templates
  • Drag and drop widget for Home content area, sidebar and footer
  • 7 multiple Color schemes
  • Layout enhancing short codes
  • Custom coded widgets
  • Social media profiles and social sharing buttons
  • All modern browser compatible
  • Short code collection
  • User short code in post/page as well in widget section
  • Category Wise portfolio settings page templates
  • Latest WordPress Version compatible


Home Page with different Color skins

Portfolio Pages
Portfolio Pages

Online Store Pages
Store, Product Detail, Cart Listing & Checkout Pages

View more detail >>

Posted on

MapPress ClassiPress Plugin for AppThemes

ClassiPress is the original & most popular classified ads theme for WordPress by Appthemes

MapPress is plugin helps to add Google Map in your ClassiPress theme via short-code or action hook in home page, listing page and search page.

You can set the map center point as per your location.

The map will list all listing post with category wise colorful icons and you can change icons from category add/edit page of wp-admin.

On individual pin point click user can get listing title with link to detail page, Address, Business Direction.

Key Features

  • Google Map API 3 Version with all latest futures
  • Minimum java-script code written for Google map functionality
  • Speedy Google map data processing by json code processing
  • Totally json data code so no effect of multiple language problem
  • Colorful category wise colorful icons
  • Easily change pinpoint icon from category add/edit page of wp-admin
  • easily place the map in any post/page detail page by wordpress shortcode
  • also wordpress action hook is given to place the code any where in php you want to show the map
  • Set the map center points & zooming factor from plugin settings.
  • set the map height & width as per your settings while adding shortcode
  • Map type selection option ROADMAP/SATELLITE/HYBRID/TERRAIN
  • Specific category listing data selection option from plugin settings.
  • and many more…


Homepage Map
Homepage Map


Category page map
Category page map


Search Page Map
Search Page Map


View More Details >>

Posted on

Corporate Responsive Multipurpose Business WordPress Theme

Corporate A responsive Multipurpose Business Theme

A responsive Multipurpose Business WordPress CMS theme. Provides all the main functionality you will need to present your products, work and yourself online in an elegant and professional style.

Every Business wants to present his products, work and himself online in an elegant and professional style. So, we came up with such a flexible design which will give you top notch & easy to use features that will make you stand out from the normal Multipurpose Business theme. This unique theme has very user friendly interface which can turn your visitor in to your buyer.

Our theme has core features like fully responsive, multiple color scheme options, localization ready, easy and attractive theme option settings, large collection of short codes, Page templates with pre-made styles and functions and much more.

See Our Fully Responsive Demo

Key Features In Refined CMS Theme :

  • A responsive Multipurpose Business WordPress CMS theme
  • Fully Responsive, mean the design will adapt to mobile phones and tablets for a more intuitive browsing experience
  • Clean Design elements
  • Stylish feature rich design with super simple admin panel
  • multiple custom page templates
  • Drag and drop widget for Home content area, sidebar and footer
  • 4 multiple Color schemes
  • Layout enhancing short codes
  • Custom coded widgets
  • Social media profiles and social sharing buttons
  • All modern browser compatible
  • Short code collection
  • User short code in post/page as well in widget section
  • Category Wise portfolio settings page templates
  • Latest WordPress Version compatible

View More Detail >> | Download Now >>

Posted on

Refined Responsive Business & Portfolio Theme

Every one wants to present his products, work and himself online in an elegant and professional style. So, we came up with such a flexible design which will give you top noch & easy to use features that will make you stand out from the normal Business/Portfolio theme. This unique theme has very user friendly interface which can turn your visitor in to your buyer.

Our theme has core features like fully responsive, color and background paten change options, localization ready, easy and attractive theme option settings, large collection of shortcodes, Page templates with pre-made styles and functions and much more.

See Our Fully Responsive Demo

Key Features In Refined CMS Theme :

  • A responsive Business/Portfolio CMS theme
  • Fully Responsive, mean the design will adapt to mobile phones and tablets for a more intuitive browsing experience
  • Clean Design elements
  • Stylish feature rich design with super simple admin panel
  • multiple custom page templates
  • Drag and drop widget for sidebar and footer
  • Color and Background paten change options
  • Layout enhancing shortcodes
  • Custom coded widgets
  • Social media profiles and social sharing buttons
  • All modern browser compatible
  • WordPress 3.4.0 & more compatible

View More Detail >> | Download Now >>

Posted on

MapRoller JobRoller Plugin

MapRoller JobRoller AppThemes Online Jobs Google Map Plugin

MapRoller JobRoller AppThemes Online Jobs Google Map Plugin

JobRoller is a online Job application theme for WordPress by Appthemes

MapRoller is plugin helps to add Google Map in the JobRoller theme through short-code or php action hook. Refer the readme.txt for more detail usage of short-code & php action hook to display google map on home page as well on category listing page.

You can set Clustered Google map with grouping Google Map with colorful Icons OR just normal google map by setting of plugin.

Map will appear for location as per the map center point of your location. The plugin also have facility to auto zoom adjust which will adjust map such a way that all pin points adjust automatically to appear in the map properly.

Plugin provide the category wise colorful & different pinpoint change setting which editable from category add/edit page. The grouping map will list all job post with colorful grouping icons and you can change icons from “icons” folder inside plugin folder.

On individual pin point click user can get job title with link, address, company with website, category type, Business get Direction …

Key Features

  • Google Map API 3 Version with all latest futures
  • Minimum java-script code written for Google map functionality
  • Speedy Google map data processing by data.json file cache
  • All job Data are store in json file (data.json) which included as script file every time
  • No run-time load of data process
  • Data json file is refresh/new data added/updated by the time of cron job you can set from plugin settings (hourly/daily…)
  • Totally json data code so no effect of multiple language problem
  • Category wise colorful & different pinpoint change setting which editable from category add/edit page
  • Colorful grouping icon change option by change icons from plugin folder
  • easily place the map in any post/page detail page by wordpress shortcode
  • Via usage of wordpress action hook you can place the code anywhere in php you want to show the map
  • How to display map on home page & category listing page and related code is given in readme.txt file with plugin
  • Set the map center points & zooming factor from plugin settings.
  • set the map height & width as per your settings while adding shortcode
  • Map type selection option ROADMAP/SATELLITE/HYBRID/TERRAIN
  • Auto zooming adjusts facility to display all points automatically in one map
  • You’re chosen category & type data display option.
  • Specific category data selection option from plugin settings.
  • and many more…

Plugin Detail >> | Download Plugin >>


Posted on

Free Premium WordPress Theme Collection

Templatelite is premium wordpress theme developer company which provide wide range of different premium wordpress template in 100% free.

I will like to introduce Templatelite as one of good company. Templatelite’s WordPress themes have received either Bronze, Silver or Gold status from ThemeGrade.com

Get select your favourite wordpress template and start working your website.

Best of luck

Posted on

How WordPress Plugins Affect Your Site’s Load Time

How WordPress Plugins Affect Your Site’s Load Time

Have you heard from developers that the more plugins you use, the slower your WordPress site gets? Well that is partially true. Some plugins add just a small query which has little to no impact on your site’s load time. Where as other plugins add jQuery and CSS on each page load (in your site’s <head></head> area). So for example if each plugin adds one jQuery file and one CSS stylesheet and you have 8 plugins like that, you just added 16 HTTP Requests. This can get really out of control when plugins start adding more than one stylesheet or jQuery files. In this article, we will show you how you can still use all the WordPress plugins you want without the additional HTTP Requests.

Note: We recommend that you at least know some PHP before diving into this tutorial.

Our Goal: Disable all Additional Scripts and Stylesheets that plugins add on each page load.

Wait a minute, Why do these plugins add these scripts and styles? Isn’t it necessary for the plugins to function properly? Glad you asked. Most likely those CSS and JavaScript codes are important to the functionality of the plugin, but we will remove it anyways to have more control on our WordPress site and make it run faster. By disabling the CSS files and JavaScripts, we can:

But, we want to take control of these files and make our sites run faster. Disabling these scripts and styles will allow us to do a few things:

  • Combine multiple files into a single file (Sprite Technique).
  • Load the files only on the pages we’re using the script or style.

Disable Scripts and Styles in WordPress

The best part about WordPress is that it has a built-in system that allows us to deregister scripts and styles that are added by the plugins. The “bad part” in this situation about WordPress is that it is open-source, so the plugins are created by people in the community (Expert developers and new developers). This means that not all plugins use the correct methods for loading scripts and styles which makes our job harder. The correct method is by registering the stylesheet or scripts with the following WordPress functions: wp_enqueue_script() and wp_enqueue_style(). If your plugin author isn’t using these functions, then send them a kind email asking them to update the plugin. This is not hard, it is just a matter of a learning curve.

To figure out what scripts or styles you want to disable, you might have to dig deeper and gets your hand dirty. This means looking in the code of your plugins.

Disabling CSS (Stylesheets)

In this example, we will use a plugin called Cleaner Gallery which adds its own CSS file on each page load. First, you have to check whether the plugin is using the correct method for adding stylesheets. To do so, you would need to open the plugin file: gallery.php (for this plugin). In there, you should run a search for “wp_enqueue_style”. You will find results like this:


Continue Reading >>

Posted on

Detect Site Issues via Google Webmaster Tools

Google truly is a fantastic company. All that they have done and continue to do to help the internet grow and mature continues to astound me. My latest favorite is their free site diagnostic notification service.

While there are services out there like Are My Sites Up, which I highly recommend, Google Webmaster Tools’ daily digest is a must for every website owner. This handy feature will email you if Google discovers any potential issues with your website and email you about them. Not only will they give you a heads up concerning site issues, they’ll even advise you on steps to take to alleviate these problems.

How to Use Google Webmaster Tools?

Configuring, enabling, or disabling this feature is extremely easy to use. Simply log into your verified Google Webmaster Tools account and visit the preferences page. Under the section titled “Email notifications,” be sure to “Enable email notifications,” set the Type to “All issues” and select the correct email address. Click save, and you’re done!

This quick and easy tip can help you detect malware on your website quickly, find out if your site is down or throwing errors, and more. To be honest, Google is a little vague about all of the “issues” they will contact you about. But believe me, if Google discovers an issue with your website, it’s definitely something you want to be aware of and fix.