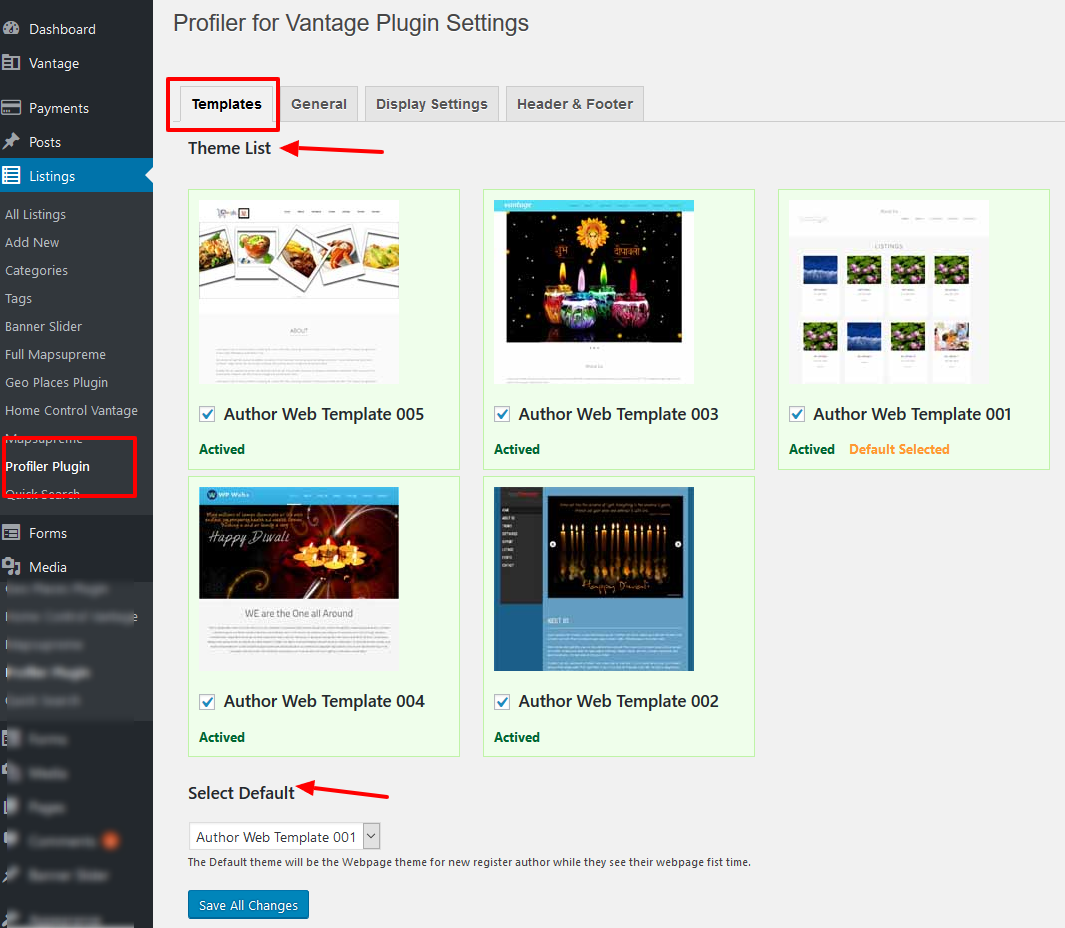
STEP 01: Plugin Settings
Templates Settings
— Go to wp-admin >> Listings (left menu) >> Profiler Plugin >> Templates (tab)
— Select the templates you want to display on front end for profiler settings to select.
— Select default template that will display for all profiler web page.
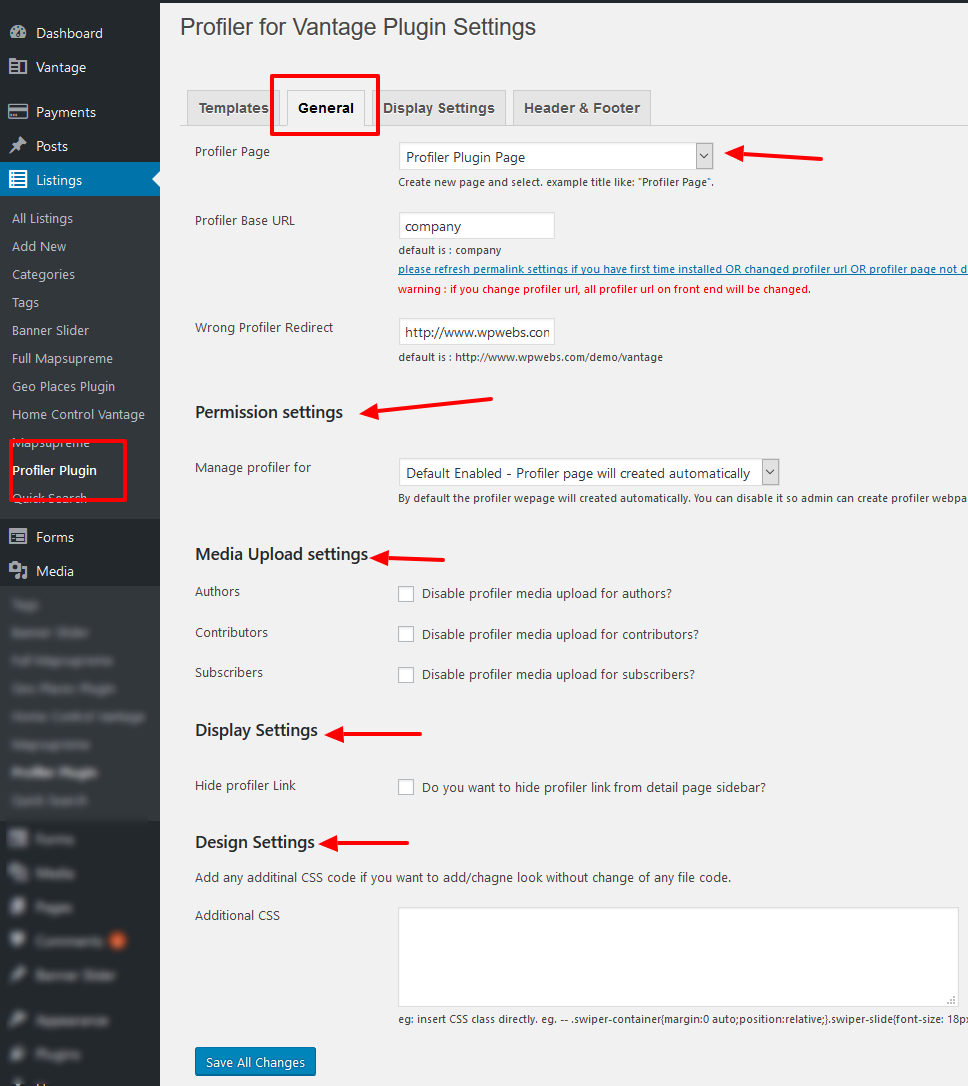
General Settings
— Go to wp-admin >> Listings (left menu) >> Profiler Plugin >> General (tab)
— Select the profiler page (new page create for profiler web page)
— URL basic, wrong redirection url
— Allow manage profiler for selected users related permission settings
— Media upload permissions
— Display & design related settings
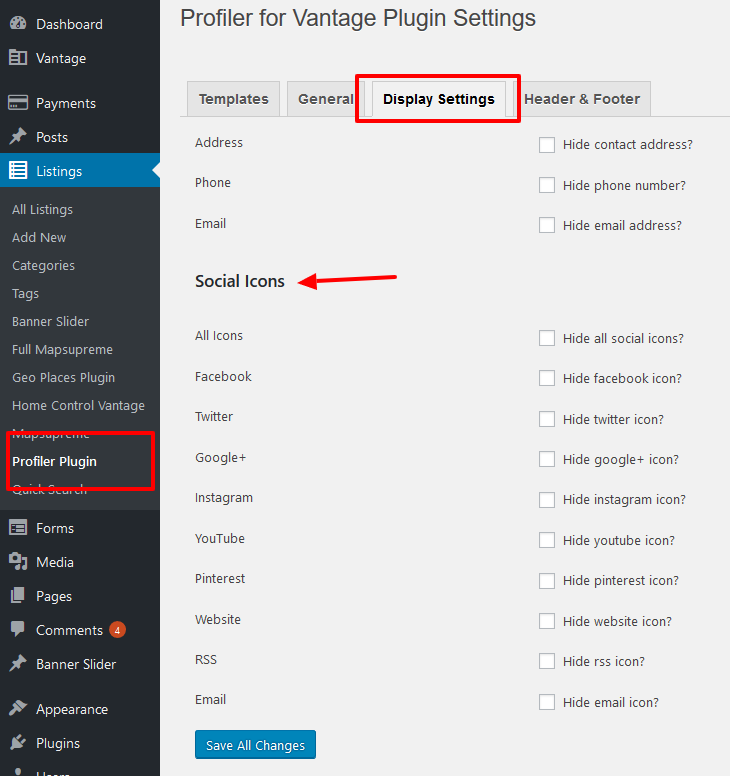
Display Settings
— — Go to wp-admin >> Listings (left menu) >> Profiler Plugin >> Display Settings (tab)
— Social connection settings
— Contact detail related settings
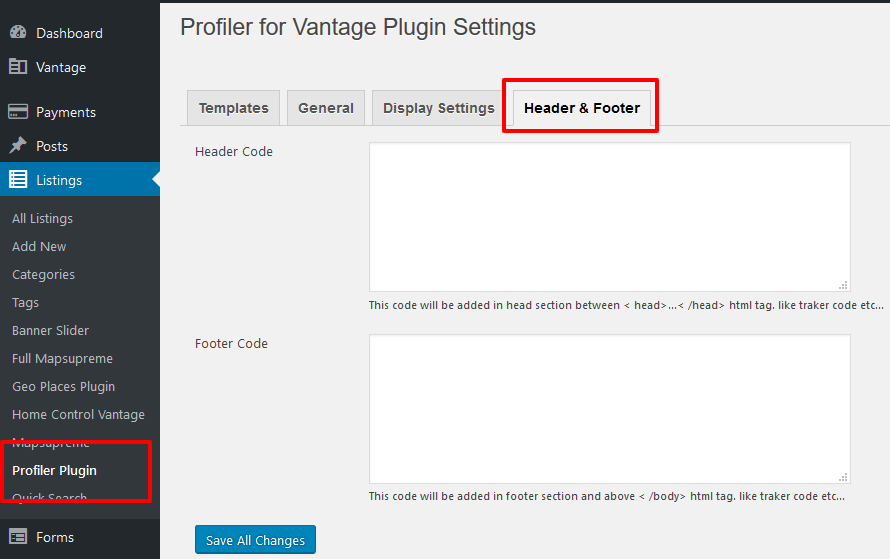
Header & Footer Settings
— Go to wp-admin >> Listings (left menu) >> Profiler Plugin >> Header & Footer (tab)
— Header & footer add script or code like tracker code, any html code….
— Header code will display under < head > …….</ head >
— Footer code will display before body tag end in the HTML page.
STEP 02: Edit Profiler (front-end)
— Go to Manage dashboard link on front end for edit user profile.
— See profiler plugin settings on EDIT PROFILE page as per blow image.
— You should set all settings carefully and save….

STEP 03: Profile Widget
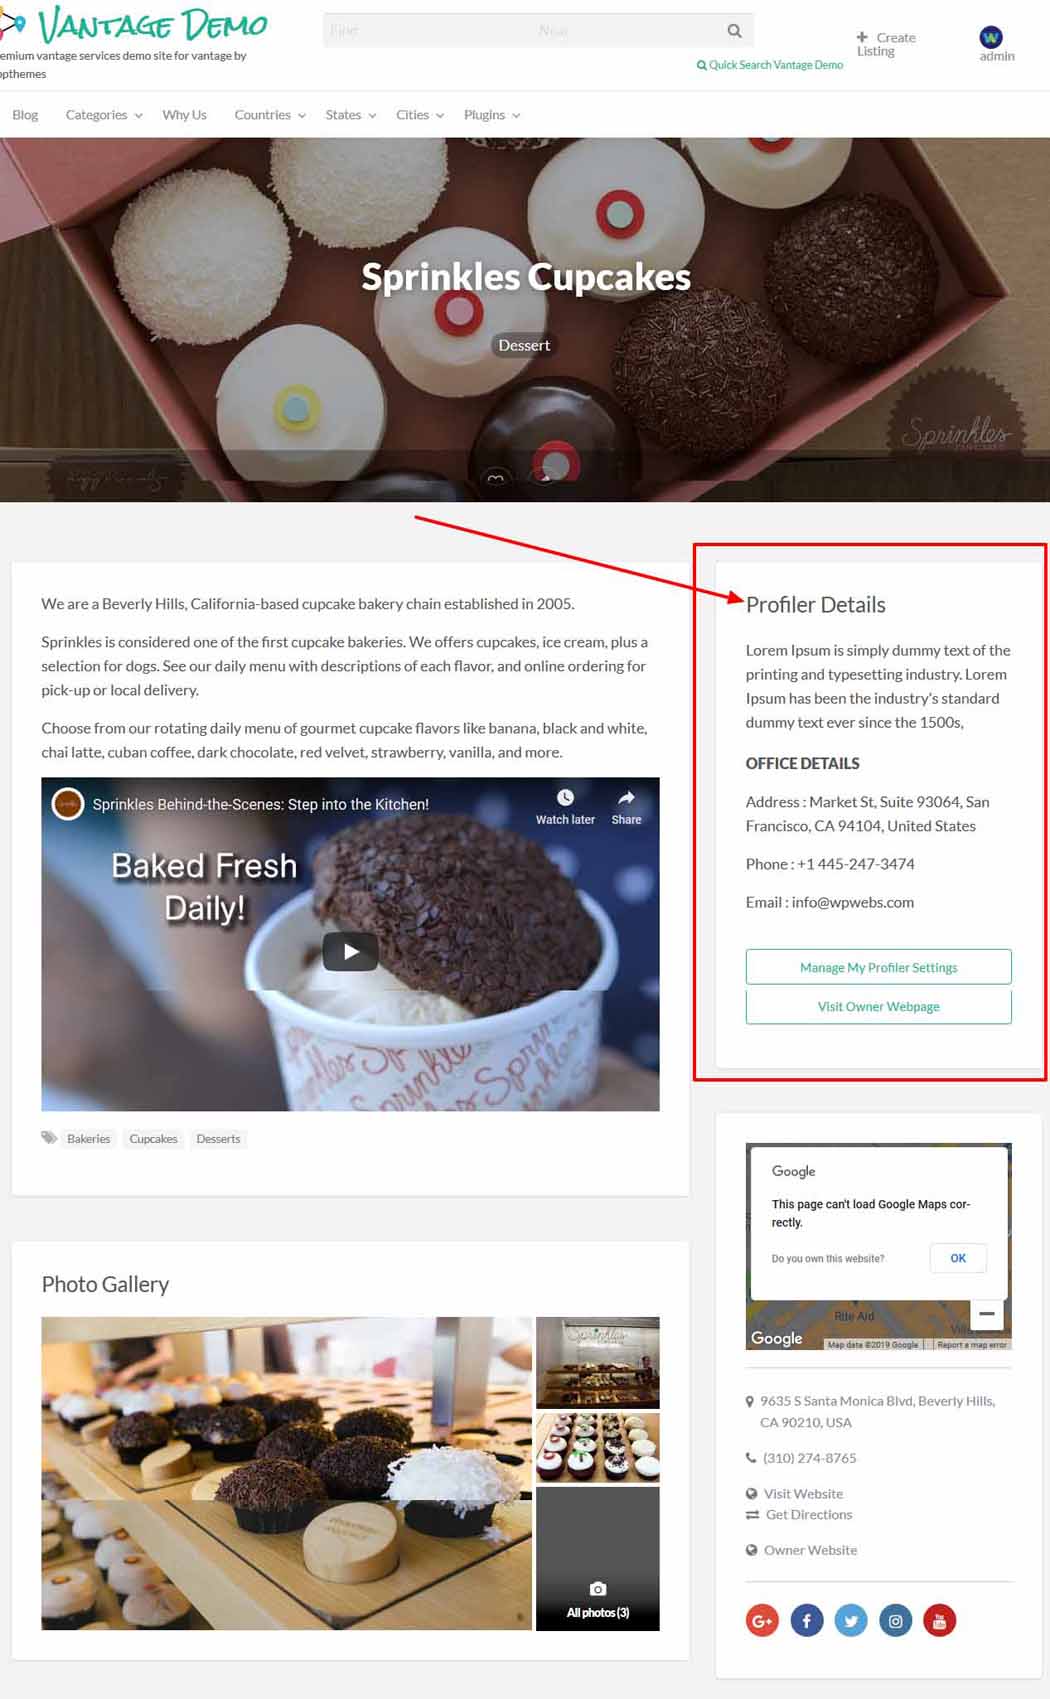
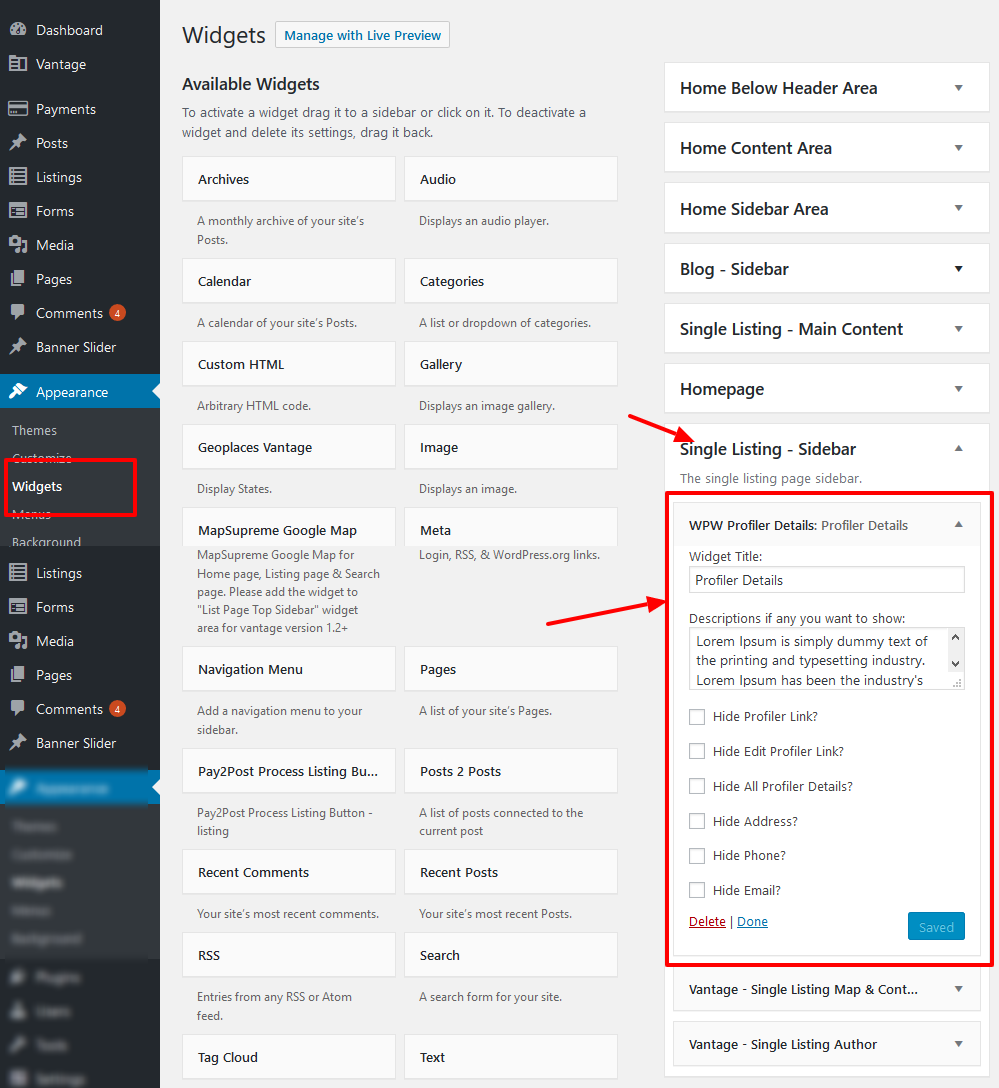
Profiler Details Display Widget
— Widget to show profiler website link & other details…
— Widget name : “WPW Profiler Details”
— Display profiler details on Listings Detail Page ( listings single page)
— The widget should be added only for
==>wp-admin > widgets > Single Listing Sidebar
Profiler Details Display on Listings Detail Page
— As per widget added for Listings sidebar, related profiler details will display automatically if available for that listings in the sidebar.
— See screen image below to get idea how it will display….