


STEP 01: Plugin settings wp-admin
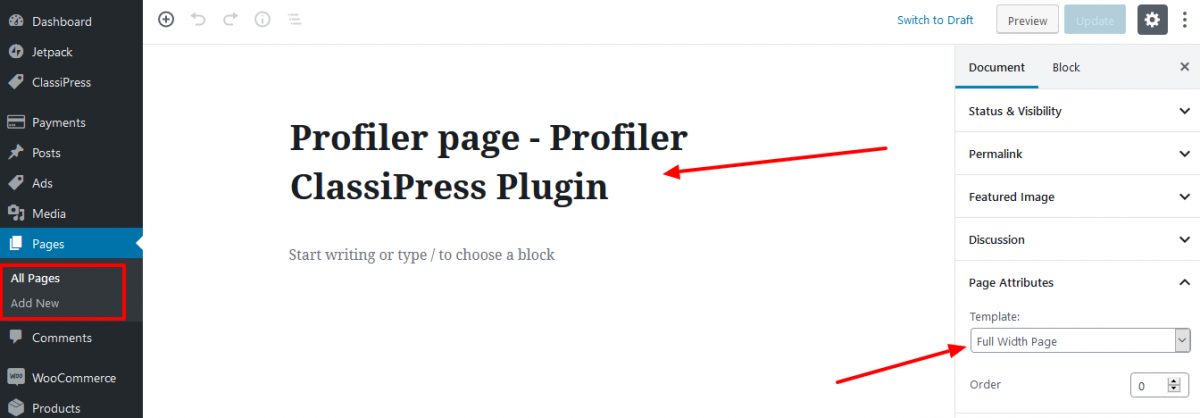
Create New page for Profiler web page
— Go to wp-admin >> Pages (left menu) >> Add New page >> create new page
— Select the created new page from: plugin settings >> General settings >> Profiler Page
Templates Settings
— Go to wp-admin >> Ads (left menu) >> Profiler Plugin >> Template Settings
— Select the templates you want to display for profiler on front-end
— Set default template which display for all profiler web page design if profiler don’t have changed/choose the profile design.

General Settings
— Go to wp-admin >> Ads (left menu) >> Profiler Plugin >> General Settings
— Select profiler web page, edit profiler page, profiler base URL, image upload permissions and other settings…

Email Settings
— Go to wp-admin >> Ads (left menu) >> Profiler Plugin >> Email Settings
— Contact email information from profiler page >> contact form

Display Settings
— Go to wp-admin >> Ads (left menu) >> Profiler Plugin >> Display Settings
— Profiler web page display settings.

Header & Footer Settings
— Go to wp-admin >> Ads (left menu) >> Profiler Plugin >> Header & Footer Settings
— Profiler page header & footer script, google analytics & tracker code related settings…

STEP 02: Edit Profiler Data wp-admin
— Go to wp-admin >> Users (left menu) >> Users List >> see Profiler column from where admin can manage profile data

STEP 03: Manage Profiler from Edit Profile (front-end)
— Manage profiler data from dashboard > edit profile >> see list of links related to edit profiler…
Edit Profile >> Basic Settings

Edit Profile >> Content Settings

Edit Profile >> SEO Settings

Edit Profile >> Menu Settings

Edit Profile >> Select Design

STEP 04: Display profiler link on ad detail & author page
On Ad Detail page

On Author page

STEP 05: Display profilers list via WIDGET
— Go to wp-admin >> Appearance >> Widgets >> drag & drop widget
— Widget title : WPW Profiler Authors
